Gbyte Recovery
Free scan and preview of your iCloud backup content. Selectively extract messages, contacts, and more from any historical backup point.
Table of contents
How iCloud Backup Works: When iCloud Backup runs, Apple saves one snapshot per device and overwrites it each time a new backup is created.
But "old iCloud backup" can mean different things — a backup from a previous iPhone you switched away from, or an older snapshot of your current device from before something was lost or changed. Both are findable, through different methods.
This guide covers 5 ways to locate and access old iCloud backups, so you can go straight to the method that fits your situation.
📌 Key Takeaways
You can check which of your Apple devices have an iCloud backup in Settings > [Your Name] > iCloud > iCloud Backup > All Device Backups. Your old iPhone 6 may still have one. → See how
Each device backup may have multiple restore points, visible during the iPhone setup process — or browsable without a reset using an iCloud backup extractor. → View restore points
To see what's inside a backup, you can restore it to your iPhone and browse from there — or use an iCloud backup extractor to preview the contents on your PC or browser without a reset. → Extract backup contents
iCloud.com/recovery stores older versions of Contacts, Calendars, and iCloud Drive files for up to 30 days — useful for recovering specific recent data, but separate from iCloud Backup. → Use iCloud.com recovery
Beyond iCloud, old backups may also exist as local files on your Mac or PC if you've previously backed up through Finder or iTunes and those files are still on that machine. → Check local backups
Apple stores an iCloud backup for each device linked to your Apple ID, as long as iCloud Backup is enabled. If you previously used another iPhone or iPad, you can view its backup information directly in Settings without resetting your current device.
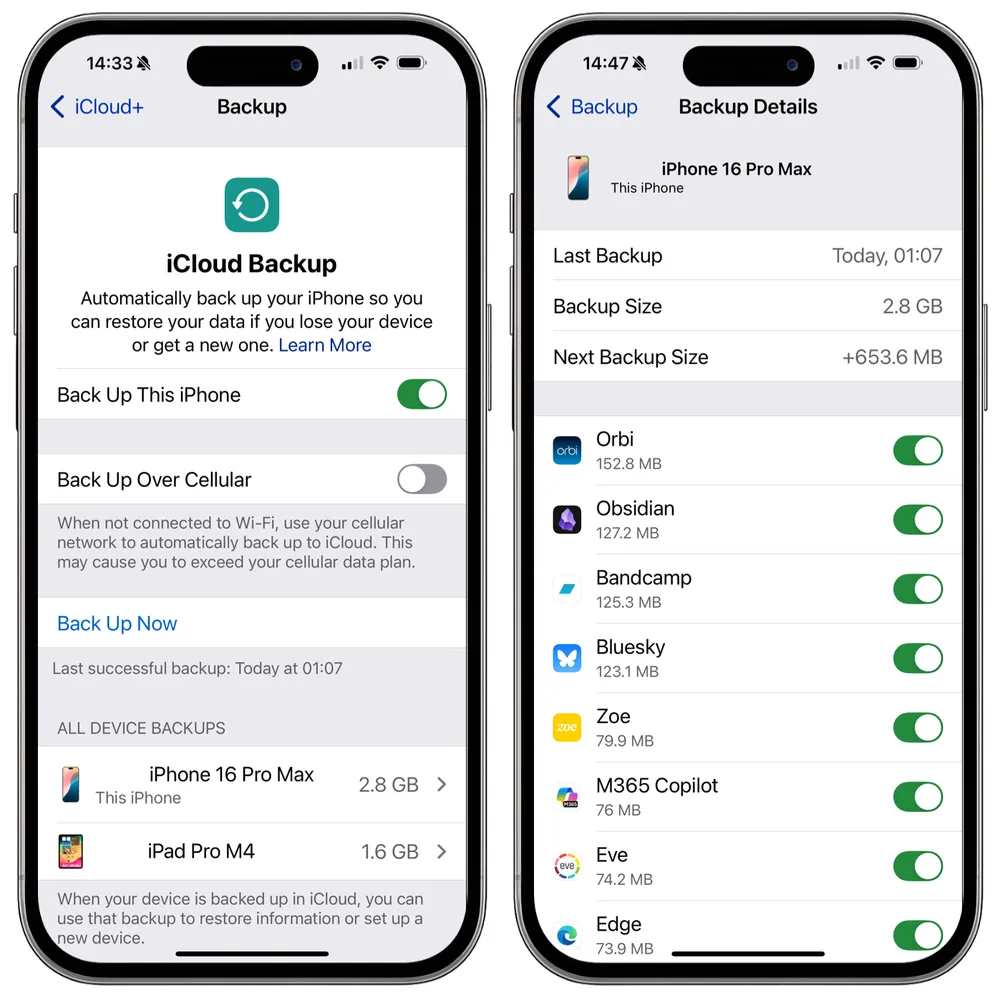
On your iPhone or iPad, go to Settings > [Your Name] > iCloud > iCloud Backup.
Scroll down to view the device list. Each listed device has an existing iCloud backup, along with its backup size.
Tap a device to see details such as the latest backup time, device name, total backup size, and which apps are included in the backup.
Troubleshooting: I Can’t Find My Old Devices in iCloud Backup
The old device may be signed in with a different Apple ID. Make sure you are logged in with the same iCloud account used on that device.
iCloud Backup was not enabled on the device, so no backup was created. If possible, access the device directly to check its data.
iCloud Backup was turned off for more than 180 days, and Apple automatically deleted the backup.
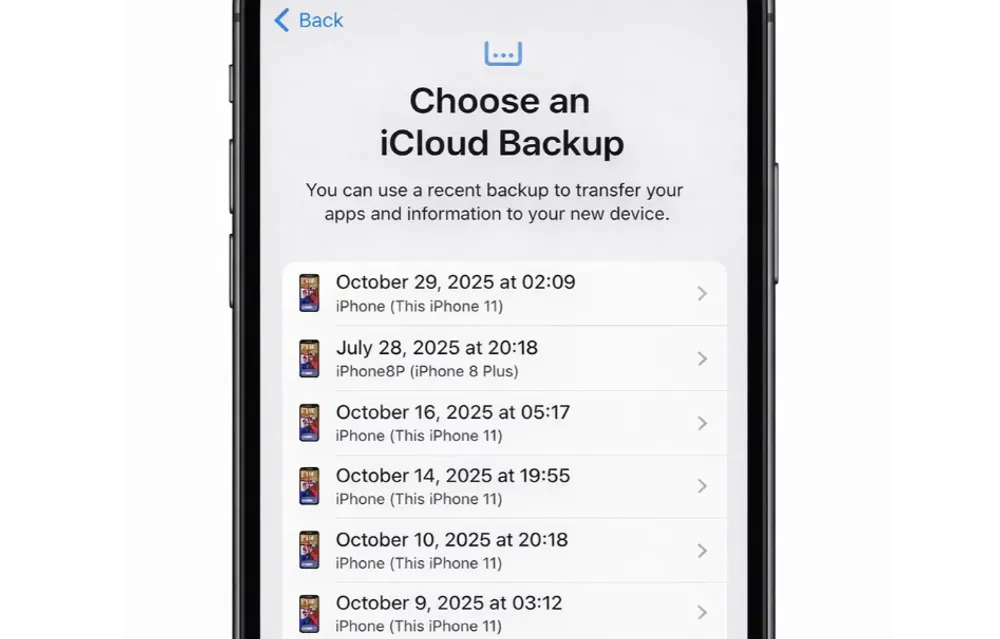
In iCloud settings, Apple only shows the most recent backup time for each device. However, during our testing in 2026, we found that several old iCloud backups may appear when you go through the official iCloud backup restore process.
Warning: This method requires erasing your iPhone first. After the restore, your current data will be replaced by the data in the selected backup, which can cause data loss.
If you don’t want to erase your iPhone, Gbyte Recovery lets you browse all available iCloud backup points directly on your computer — no reset required, and free to use.
Download and install Gbyte Recovery on your Mac or PC.
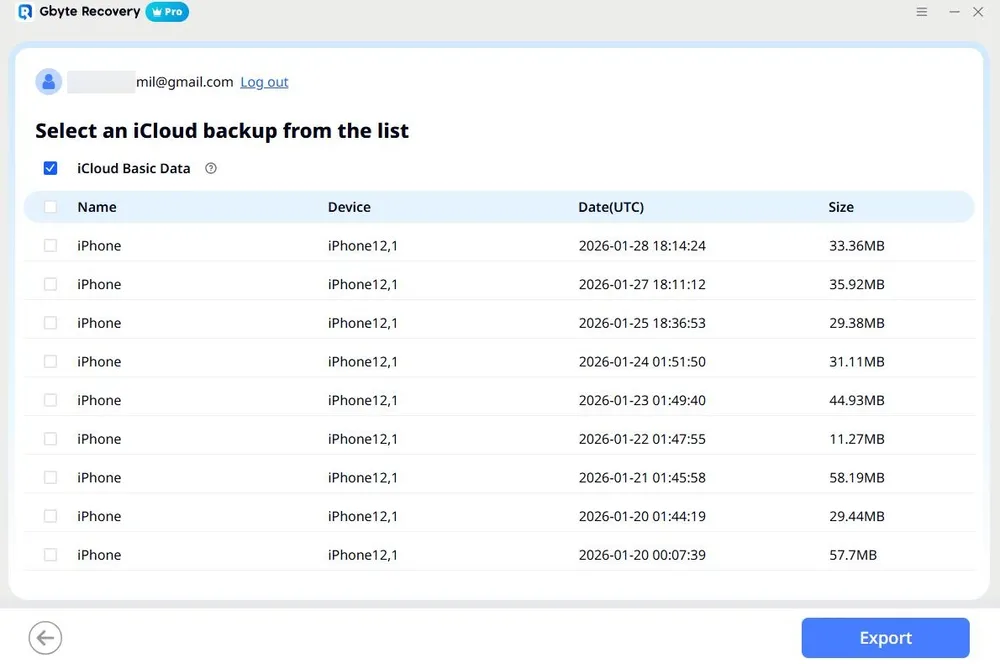
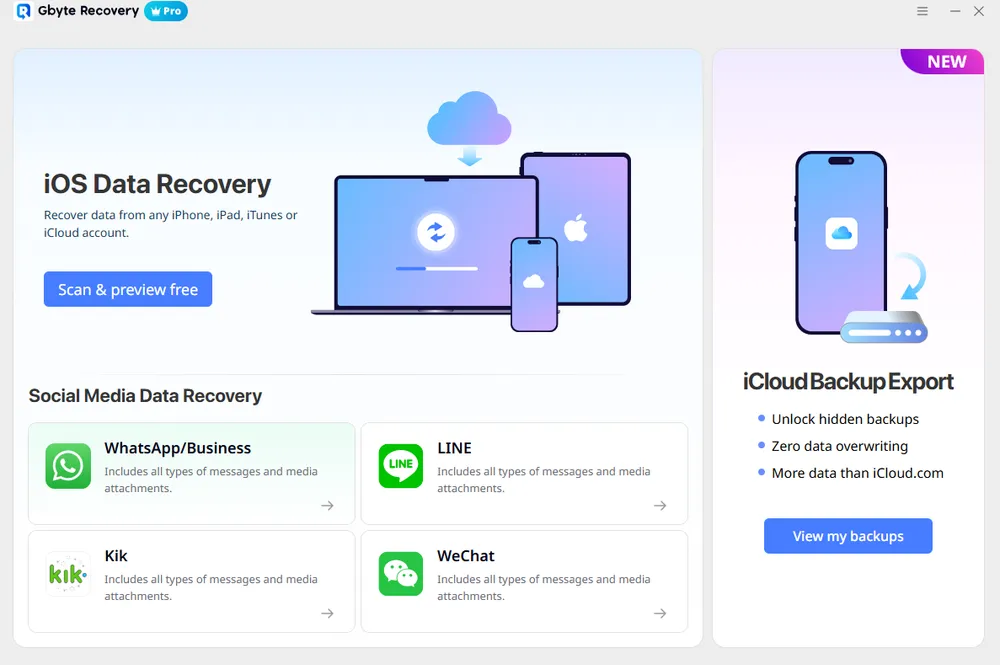
Open the app and select iCloud Backup Export.
Sign in with your Apple ID to connect your iCloud account.
All available backup points for your devices will be listed. (View for free)
Tip: You can also download the contents of each backup point with Gbyte Recovery.
Knowing a backup exists is one thing — knowing whether it actually contains the data you’re looking for is another. There are two ways to check what’s inside an iCloud backup.
Restore the Backup to Your iPhone
Once restored, you can browse your device normally to see what data is there. The downside is that this overwrites your current data
Preview Backup Contents Without Reset and Restoring
If you want to check what’s inside a backup before committing to a full restore — or simply want to recover data from iCloud backup without reset — Gbyte Recovery lets you preview the contents of any iCloud backup directly on your PC or mobile browser, for free.
With Gbyte Recovery, you can:
Access all historical iCloud backup versions, including the ones that cannot be restored through Apple’s official recovery process
Parse and preview over 30 types of data from iCloud backups, including messages, photos, WhatsApp, Instagram, Facebook, Microsoft Teams, and more
Selectively recover data from different backup versions without resetting your iPhone
Run a free scan and preview older iCloud backup content before recovery
How to Use Gbyte Recovery to Find Old iCloud Backups and See What's Inside
Step 1. Install and launch Gbyte Recovery on your computer. If a computer is not available, you can also start a free scan directly from your mobile device.
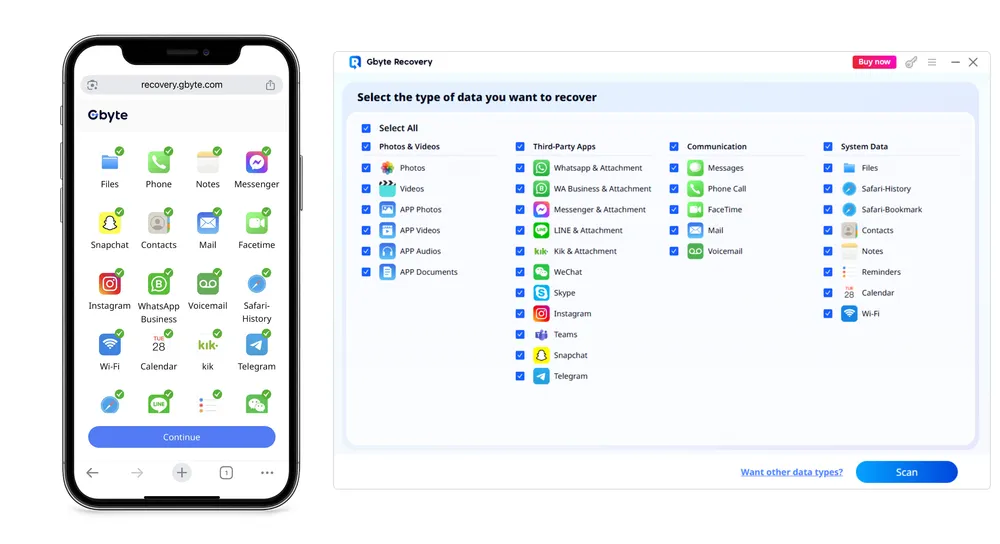
Step 2. Open the app, choose iOS Data Recovery, and select all data types.
Tip: If you only need specific data from older backups, selecting fewer data types can reduce scan time.
Step 3. Securely sign in with your Apple ID to connect your iCloud account.
Step 4. Click Scan and wait for the process to complete. Gbyte Recovery analyzes all historical iCloud backup data. It compares different data states to identify deleted items and mark them in red. After the scan, you can preview the results for free before recovery.
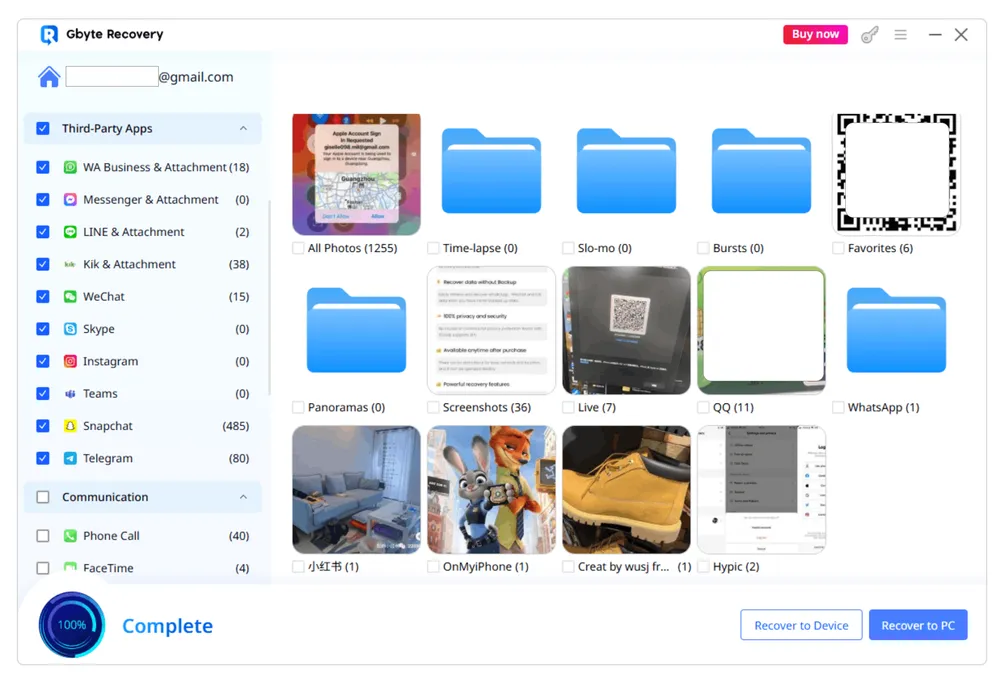
Step 5. Select the items you want to restore, then click Recover.
Besides iCloud Backup, iCloud.com offers a Data Recovery feature that also stored old version of your data. This feature allows you to recover files from iCloud Drive and other supported apps within the last 30 days.
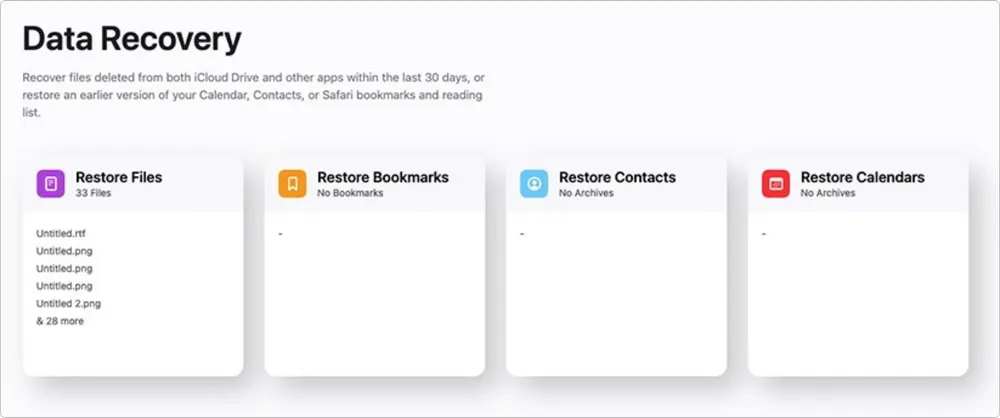
Step 1. On your computer or tablet, visit icloud.com/recovery and log in with your Apple ID.
Step 2. You will see available deleted items or previous file versions. Select the data you want to recover and confirm to restore it.
Limitation: This method only works for certain data types—Contacts, Calendars, Bookmarks, and iCloud Drive files—and typically only keeps recoverable items for up to 30 days. It does not allow recovery of older messages, photos, or backups from previous years.
If you have ever connected your iPhone to a Mac or Windows PC, an old local backup may still exist on that computer. Local backups are stored on your hard drive and are not synced to iCloud, so they may contain older data no longer available in iCloud.
On a Mac (macOS Catalina or later):
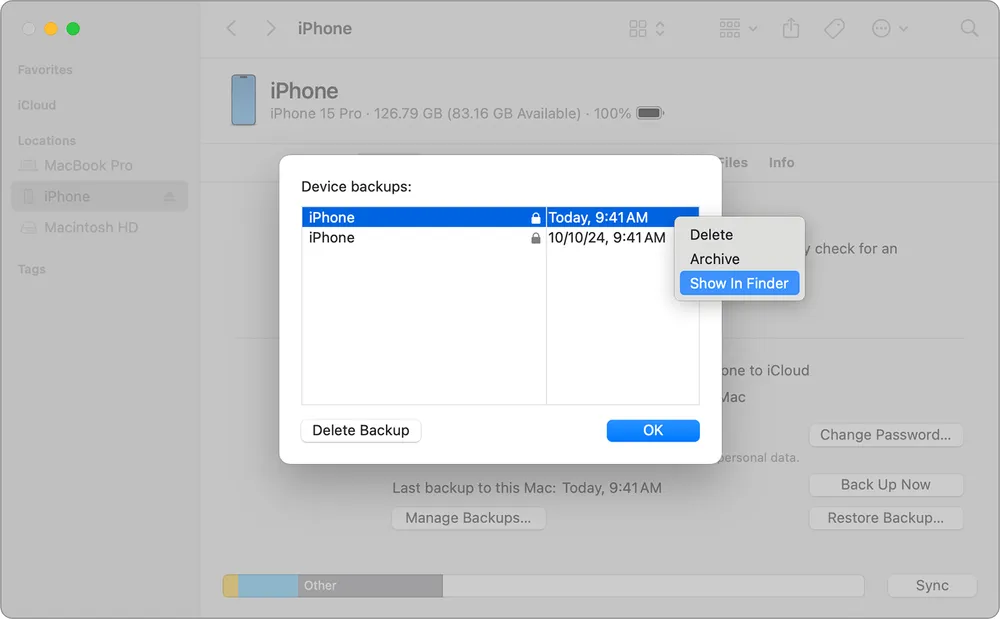
Step 1. Connect your iPhone to your Mac.
Step 2. Open Finder and select your device from the sidebar.
Step 3. Under the General tab, click Manage Backups to see a list of all local backups on your Mac.
You can restore an older backup to your iPhone, but doing so will overwrite your current data.
On Windows or older macOS (with iTunes):
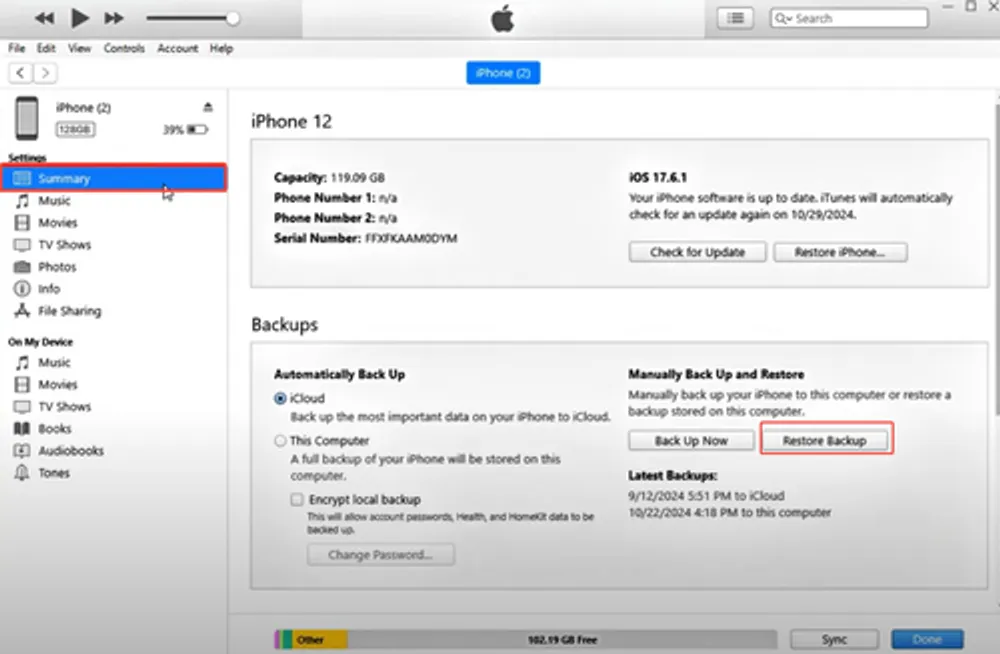
Step 1. Open iTunes and go to Edit > Preferences > Devices.
Step 2. You’ll see a list of all device backups made with that computer.
Step 3. Hover over a backup to check the date and device name. Older backups may contain the data you’re looking for.
Check Old Computers: If you’ve switched computers over the years, check any old laptops or desktops. Local iPhone backups stay only on the computer where they were created, so older machines may hold valuable data.
Each method covers a different scenario — the right one depends on what you’re looking for and whether you’re willing to reset your device.
Method | Best for | Limitations |
Gbyte Recovery |
| Cannot restore device settings or home screen layout |
iPhone Settings | Checking which devices have a backup and managing them | Only shows the most recent backup per device |
iCloud Restore Process | Viewing all available backup points |
|
iCloud.com/recovery | Recovering recent deleted iCloud data |
|
Local Mac/PC Backup |
|
|
Old iCloud backups sometimes are hidden, overwritten, or stored in ways Apple no longer shows directly. That’s why it’s worth trying all the methods above: checking your iPhone settings, using Gbyte Recovery, restoring from iCloud on an older device, or exploring local backups on your computer.
Your old data might not be easy to spot at first. You may need to go through the full restore process or use a specialized recovery tool to uncover it.
And remember, your old memories don’t always live only in backups. If you’re looking for something specific, like old WhatsApp photos or messages, check out dedicated recovery methods for those apps.
Good luck and hopefully, you’ll soon find the old iCloud backup that holds your lost memories!

Mia Lee
AuthorMia Lee studied psychology before joining a mobile software team as a product designer. She worked on file transfer, cloud sync, and storage organization, helping shape smoother data flows between devices and apps.
Gbyte Recovery
Don't wait until your data is gone forever! Try Gbyte iOS Recovery for free—scan first!
100% secure. Your data always stays private.
Share


Related articles
Subscribe Our Newsletter
For exclusive tutorials, product updates & phone tips, protect your data and prevent loss!
You can unsubscribe from our newsletter at any time by clicking the "Unsubscribe"link at the bottom of our emails.
Copyright @2026 Gbyte. All rights reserved.
The installation wizard will automatically start after downloading.
After registration, the recovery process can be managed through the web interface.
You get it all with your purchase - no locked features, no hidden limitations.